T.O. 33B-1-1
5-18
Because of the variation in a signal due to curved surfaces, it is best to have a curved surface reference standard for set
up of the test. The curved surface of the reference standard should be similar to the curved surface of the test part.
Specifically, when performing straight beam inspection on curved surfaces of cylindrical or irregularly shaped products,
special ultrasonic test blocks, containing specified radii of curvature and flat-bottom holes of standard diameter may be
required. For inspecting parts with convex surfaces or radii up to 4 inches (8-inch diameter), blocks conforming to the
applicable specification or procedure shall be used. For parts with convex radii over 4 inches, use standard flat face
blocks. For more information see ASTM standout E1315 for steel blocks (Ultrasonic examination of steel with convex
cylindrically curved entry surfaces.)
5.1.7.3
Internal Mode Conversion.
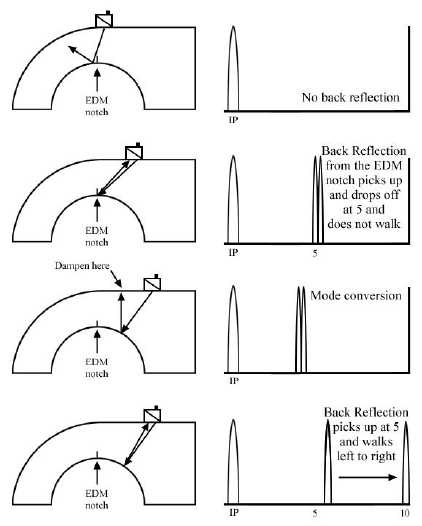
A frequently misinterpreted form of mode conversion found in the field is shear wave converted to longitudinal. For
example, on an H-3 sleeve and spindle inspection using a 45 transducer to inspect a large radius or bore, a
nonrelevant indication occurs in the area of interest as a result of this conversion. At a certain transducer position, part
of the shear wave will convert to longitudinal as it reflects from the bore. This longitudinal wave will travel at double
the velocity of the shear wave and will be reflected to the surface, then back to the bore. It then returns to the
transducer to cause a nonrelevant indication that is similar to a crack indication. In this case, finger damping the part
surface where the longitudinal wave reflects off of the part surface in front of the transducer will identify the indication
as nonrelevant.
Figure 5-19. Example of Mode Conversion


