
TM 10-5410-228-24
To prevent injury to personnel, always wear eye protection when drilling.
(6)
Drill out two rivets (20) securing strap assembly (21) to mounting plate (19).
b. Installation (Refer to Figure 2-26)
NOTE
The following steps (1 and 2) are typical for installation of most LMS straps.
Reference TM 10-5411-224-14 for general repair procedures using rivets.
(1)
Secure strap assembly (21) to mounting plate (19) with two rivets (20) (Item 72, Appx E).
(2)
Secure mounting plate (19) to LMS with four screws (16), four new lockwashers (17) (Item 18,
NOTE
Reference TM 10-5411-224-14 for general repair procedures using rivets.
(3)
Secure mounting strap (14) to interior of emergency exit door assembly (15) with two rivets (13)
(Item 81, Appx E).
(4)
Secure strap assembly (11) to exterior of door assembly (12) with two rivets (10) (Item 80, Appx
NOTE
The following step is typical for installation of ring assemblies on both the driver side and
passenger side in LMS.
(5)
Secure ring assembly (8) and flat washer (9) to LMS with two flat washers (7), a new lockwasher
(6) (Item 19, Appx E) and nut (5).
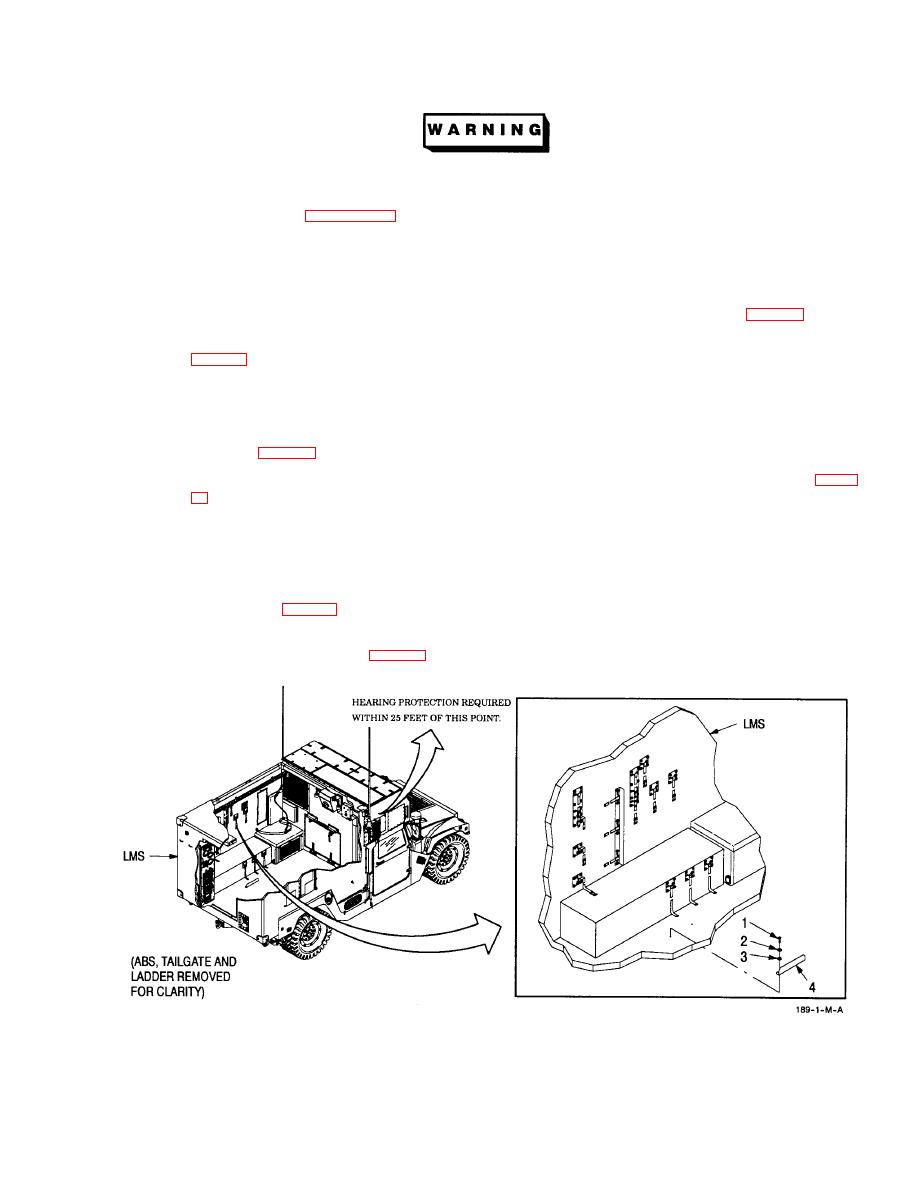
(6)
Secure door bracket (4) to interior driver side floor of LMS with two screws (1), two new
lockwashers (2) (Item 17, Appx E) and two flat washers (3).
2-171

